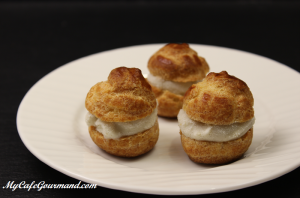
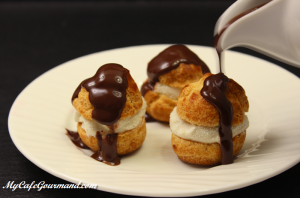
Profiteroles – French cream puffs filled with vanilla ice cream and topped with chocolate sauce. Chocolate sauce on this profiteroles is the “live jazz”. Don’t let the long recipe scare you, it is very easy and worth all the time involved. It is a great dessert you can impress your family and friends with.
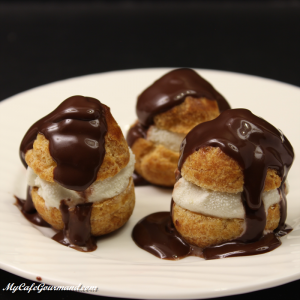
Profiteroles With Vanilla Ice Cream And Chocolate Sauce
Ingredients
Dough
- 200 ml water
- 1 pinch salt
- 100 g butter
- 120 g sifted flour
- 3-4 eggs
Filling
- 800 g chocolate or vanilla ice cream
Chocolate sauce
- 250 ml milk or heavy cream
- 300 g dark chocolate (60% cacao)
Instructions
The dough
- Preheat oven to 390 degrees F. Line 2 baking sheets with parchment paper.
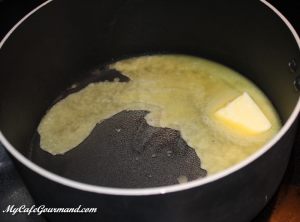
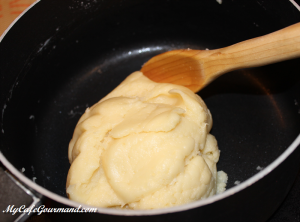
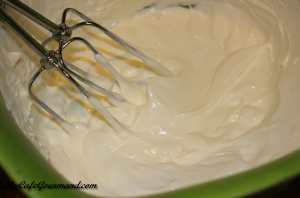
- In a medium pot, add water, butter and salt. Bring to a boil and remove from the heat.
- Add sifted flour and mix well.
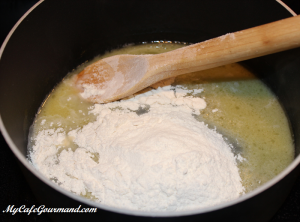
- Mix until the dough comes away from the walls and forms into a ball.
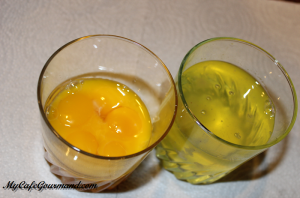
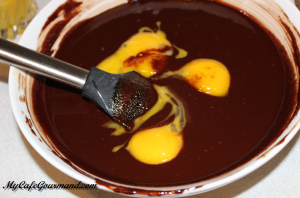
- Add the eggs, one by one and mix well. (If the eggs are large, use only 3 eggs.)
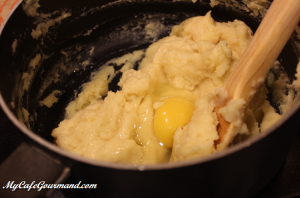
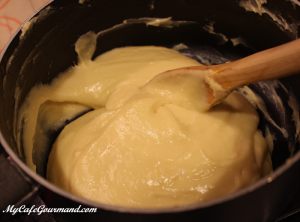
- The dough should become smooth and shiny. Return saucepan back on the heat and keep mixing for about 30-50 seconds, to dry out the moisture. Remove from the heat.
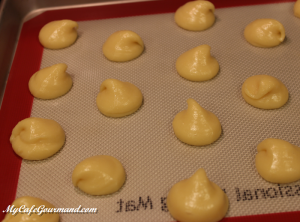
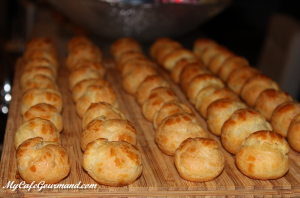
- Transfer the dough to a piping bag to pipe specific shapes (size of the walnut is the best). Space the puffs slightly apart on the baking sheet, because the dough will rise.
- Bake for about 20 minutes or until the puffs are puffed and golden brown in color. Do not open the oven while baking. Remove from the oven, let it cool completely and carefully transfer to a flat surface.
Filling
- Cut puffs in half. Place one small scoop of ice cream ball on the bottom of each puff.
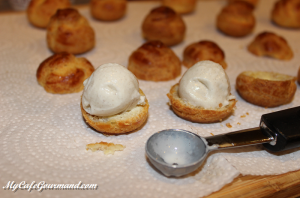
- Replace the top. As soon as you done, place them in the freezer, until they are ready to be served.
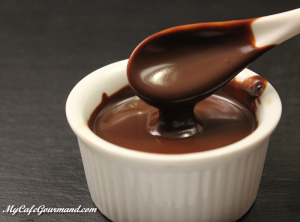
Chocolate souce
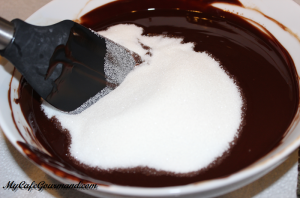
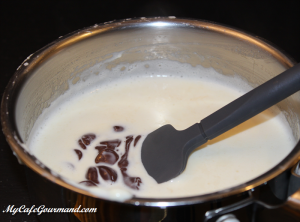
- In a small, saucepan bring milk to boil, remove from the heat and pour the liquid over the chocolate. Allow it to sit for 1 minute.
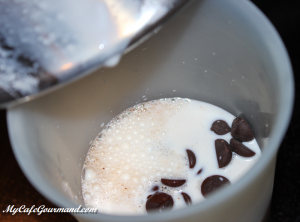
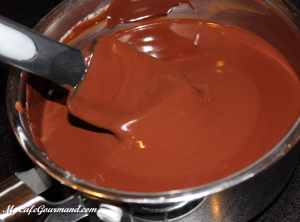
- Mix it until the mixture is smooth.
- Remove the profiteroles from the freezer. Arrange 3 puffs per plate. Drizzle each serving with chocolate sauce and Voilà! 😉 Bon appetite.
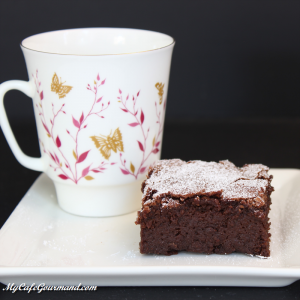
Flourless chocolate cake
The flourless chocolate cake is a delicate gluten free dessert that melts in your mouth. The recipe is absolutely simple without any flour! All you need is chocolate, butter, sugar and eggs.
Flourless chocolate cake
Ingredients
- 200 g chocolate chips (60%)
- 150 g unsalted butter
- 200 g sugar
- 6 eggs
- 2 pinches salt
- 1/4 tbsp powdered sugar
Instructions
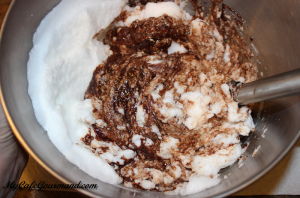
- Melt the chocolate and butter on a water bath or in a microwave. Mix well.
- Add sugar and mix well.
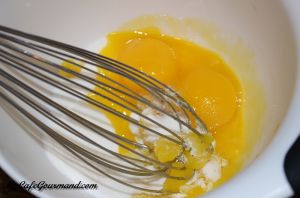
- Separate yolks from egg whites.
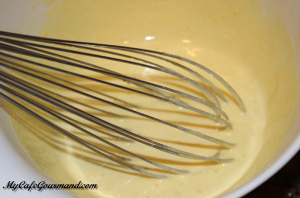
- Add yolks into the melted chocolate and mix.
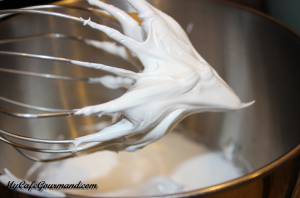
- Add salt to the egg whites, and beat into a thick foam.
- Using a spatula carefully fold in whipped egg whites into chocolate mass.
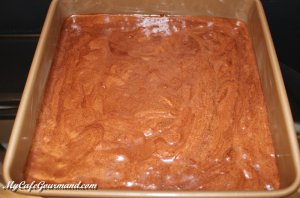
- Preheat oven to 380 degrees F. Generously butter a baking pan and pour the batter into the cake pan.
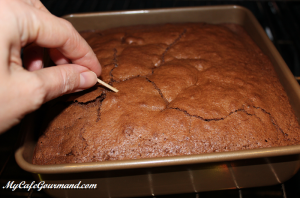
- Bake in in the preheated oven for about 25 minutes. The exact time of baking depends on the oven, size and quality of the baking pan. Once the the cake is moist and not liquid inside (it’s not a lava cake) – it’s ready. Please, don’t overcook!
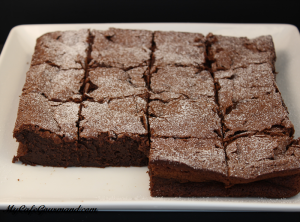
- Let the cake cool then carefully remove it from the pan. Dust it with powdered sugar and serve.
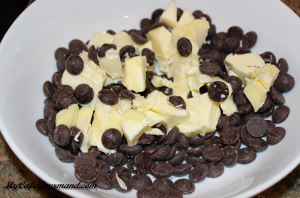
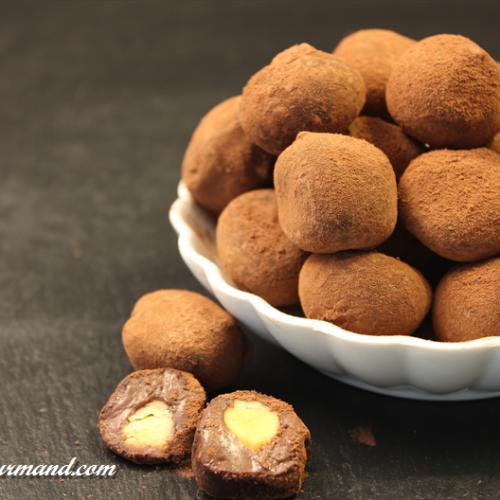
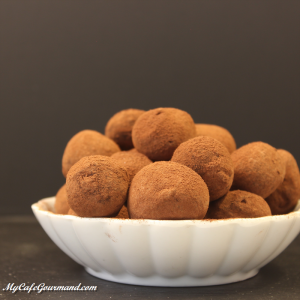
Chocolate Hazelnut Truffles
Chocolate Hazelnut Truffles is one delicacy that no one can refuse. The roasted hazelnut compliments the rich cacao powder. Store the truffles in container in the fridge for up to 5 days, but they will disappear from the fridge a lot faster, trust me on this.
Chocolat Hazelnut Truffles
Ingredients
- 150 ml heavy whipping cream
- 200 g dark chocolate (60-70% cacao)
- 50 g unsalted butter
- 30 g hazelnuts
- 2 Tbsp cacao powder
Instructions
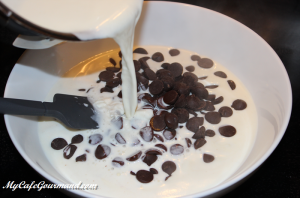
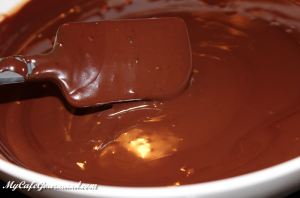
- Bring the heavy cream to a boil. Pour the cream over the chocolate chips. Wait 1-2 minutes until chocolate melts.
- Add butter and whisk until smooth. Place it in the frizzer for about 2 hours, until firm enough to roll.
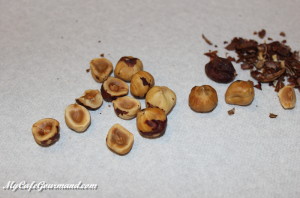
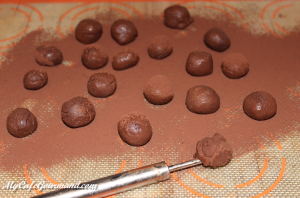
- Preheat oven to 350 degrees F. Spread the nuts in an even layer on the baking sheet, and roast it for 10-15 minutes. Stirring every 3 minutes. Check the nuts. You are looking for the color to be a few shades darker. When the nuts are browned and smell nutty, remove from the oven and transfer onto a plate. Cool it and clean from the flakes. I like my truffles extra tiny, so I cut each hazelnut in half. You don't have to cut them if you are making large truffles.
- Use a teaspoon or small cookie scoop to portion the ganache, hide one hazelnut inside each piece, roll the balls between hands, until smooth and place on a plate.

- Roll in cacao powder.
- Refrigerate for at least 1 hour.
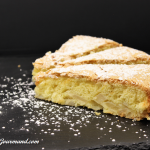
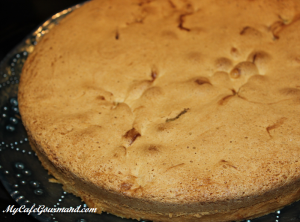
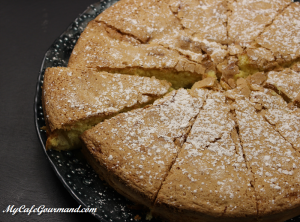
Easy Apple Cake
Delicate and full of apples easy to make cake. Recipe is very similar to famous Russian Apple Sharlotka but with a little of olive oil and baking powder. Must try!
Easy Apple Cake
Ingredients
- 4 eggs
- 200 g sugar
- 150 g sifted flour
- 2 tsp baking powder
- 2 Tbsp olive oil
- 3 big apples Granny Smith
- 1 tsp confectioner's sugar (facultatif)
Instructions
- Preheat oven to 380 degrees F. Grease and flour a round cake pan or line the bottom of the pan with parchment paper.
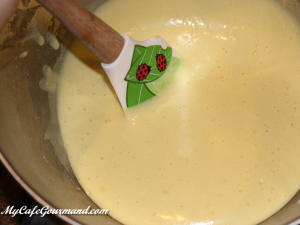
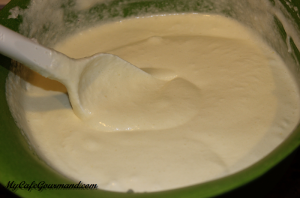
- Using an electric mixer, beat eggs and sugar. Add flour and baking powder. Mix well, then add oil and mix last time.
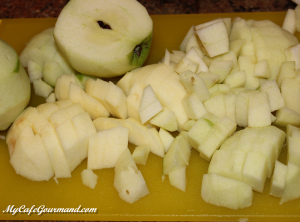
- Peel and dice apples into small pieces. Lay out the apples on the bottom of the pan.
- Pour the batter over the apples.

- Bake for about 45 minutes or until а knife inserted in the middle comes out clean.

- Let the cake cool then transfer to plate.
- Sprinkle with confectioner's sugar.
Lemon Shells Stuffed With Ice Cream
Refreshing chocolate and lemon treats, served in the natural lemon shells. If you wish to serve them in a la cafe gourmand style, use small lemons, surprise your friends.
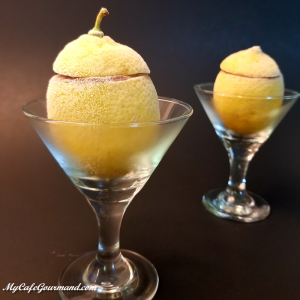
Lemon Shells Stuffed With Ice Cream
Ingredients
- 6 lemons
- 1 (300 g) lemon sorbet
- 1 (300 g) chocolate ice cream
Instructions
- Cut off the top of the lemon. Hollow out each lemon by using a teaspoon. Remove juice and flesh, but be careful not to puncture the lemon skin.
- Spoon some lemon sorbet into shells and press firmly with teaspoon. Fill the rest of the lemon with chocolate ice cream.
- Place stuffed lemons in the freezer with the hats on top. You can serve this fancy dessert in as little as one hour, or when the lemon shells are completely frozen.
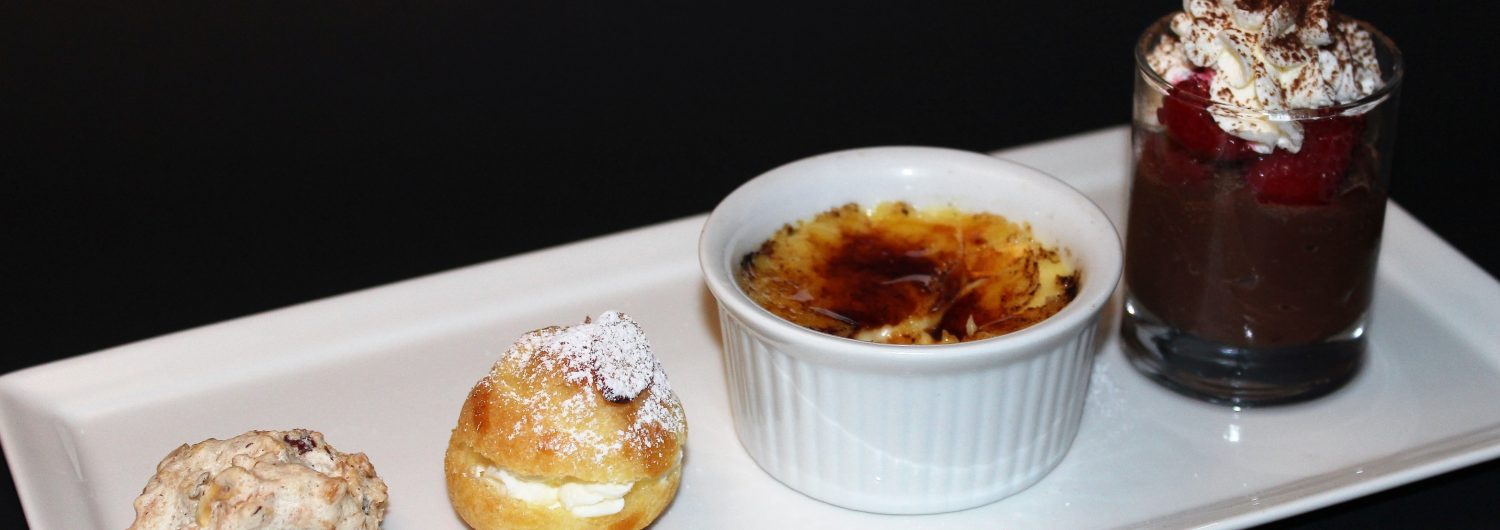
Vanilla Creme Brulee
Absolutely amazing what a little cream, a little sugar and couple of eggs can turn into…. Perfect restaurant quality dessert. A rich custard topped with a hard layer of caramel. This Vanilla creme brulee is very easy to make if you follow all the steps correctly.
It will perfectly complete your cafe gourmand if the crème brûlée is served in small ramekins.
Look at this short video ! 🙂

Vanilla Crème brûlée
Ingredients
- 8 egg yolks
- 120 g granulated sugar
- 1/2 vanilla bean
- 640 ml whipping cream
- 6 tsp granulated sugar
Instructions
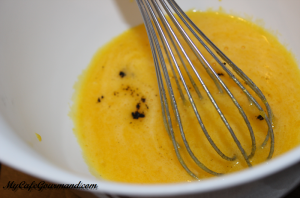
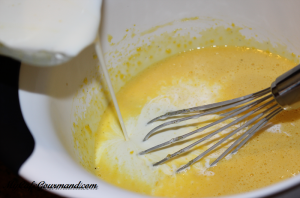
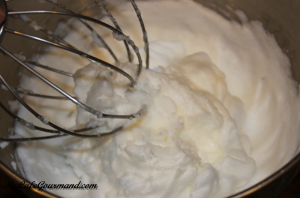
- Preheat oven to 250 degrees F. Split the vanilla bean in half and scrape the seeds into the cream. In a medium bowl, combine together sugar, eggs yolks, vanilla and whisk.
- Add the cream a little at a time and stir. Remove the scum with a tea spoon.
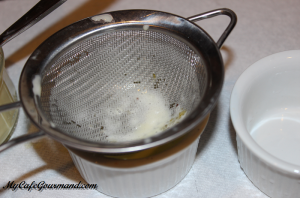
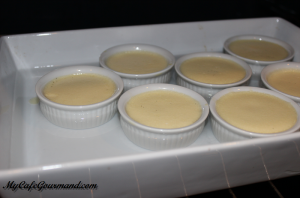
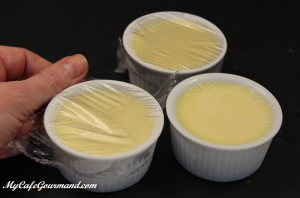
- Strain the mixture through a fine sieve and pour it into the ramekins. Divide cream mixture among ramekins (about 6 ramekins).
- Arrange the ramekins in a baking pan with deep sides. And carefully pour water around ramekins so that the water level must reach about 2/3 of the ramekins.
- Bake for 1 hour and 30 minutes. You will know its ready when the custard is wobbly and jiggle from side to side when nudged (it looks like jello).
- Remove the custard from the water bath and let cool completely, cover with plastic wrap and refrigerate for 6 hours (overnight).
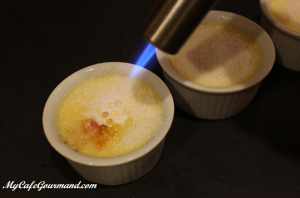
- Before serving, cover each cold creme brulee evenly with sugar (1 tsp). Caramelize using a propane torch. If you don’t have one propane torch, use the broiler: put the oven rack about 6 inches away from the broiler. Place the custards on the baking sheet and broil for about 3-5 minutes, or until sugar bubbles and turns golden brown. (Keep a close eye on them, they can burn quickly)
Notes
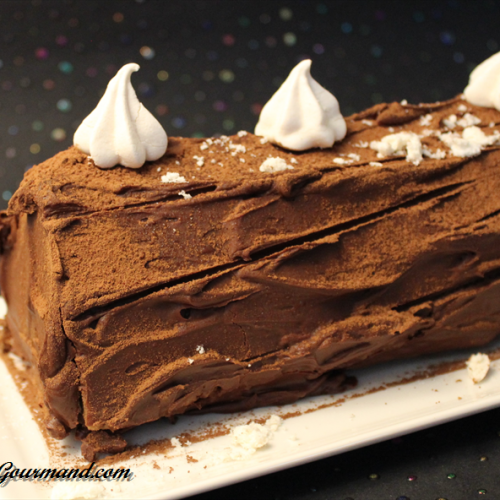
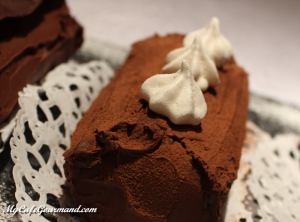
Chocolate Yule Log (Bûche de Noël)
Chocolate Yule Log (Bûche de Noël) is the French roll cake very popular during the Holiday season. This is a delicious version of Yule Log you can make at home using very simple ingredients you can find in every store.
Chocolate Yule Log (Bûche de Noël)
Ingredients
Sugar syrup
- 150 g sugar
- 300 ml water
Chocolate ganache
- 200 ml heavy whipping cream ( 35%)
- 200 g dark chocolate (60-70% cacao)
- 15 g unsalted butter
Biscuit
- 4 eggs (at room temperature)
- 120 g sugar
- 120 g all purpose flour
- 1 Tbsp cocoa powder
Chantilly cream
- 250 ml heavy whipping cream ( 35%) very cold
- 50 g mascarpone cheese
- 1.25 Tbsp sugar
Decoration
- Few meringues, pieces of chocolat
Instructions
Sugar syrup
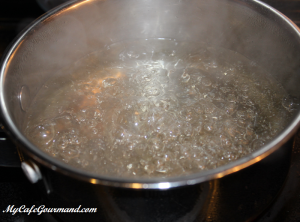
- In a small pot, bring cold water and sugar to the boil. Keep boiling for a few minutes, stir constantly until the sugar dissolves completely. Remove the pan from the heat and let cool down. When the syrup is cold, you may add vanilla or the Triple Sec liqueur (optional).
Biscuit
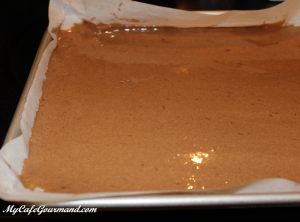
- Preheat oven to 380 degrees F (180°C). Line a baking sheet with parchment paper.
- Using an electric mixer, beat eggs and sugar until the mixture becomes thick, fluffy, and triples in volume.
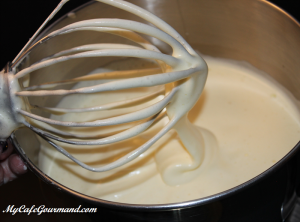
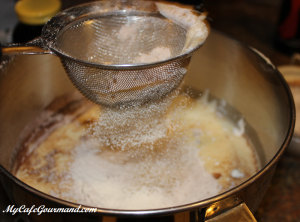
- Using a spatula, gently fold in flour and cocoa powder.
- Spread the batter evenly in thin layer into the prepared baking sheet. Bake for 7 to 8 minutes in the preheated oven until a toothpick inserted in center of biscuit comes out clean.
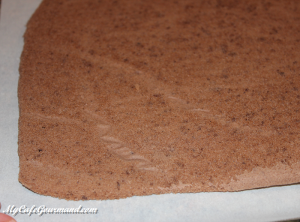
- Turn upside down onto clean kitchen towel and carefully remove parchment paper. Let cool down.
Chocolate ganache
- Boil the heavy whipping cream. Pour the boiling cream over the dark chocolate. Wait for one minute.
- Then mix it until the mixture is smooth.
- Add butter and mix until this is fully dissolved.

- Let cool the ganache for about 30 minutes in the fridge. Mix and check frequently: the ganache is ready when it’s not anymore liquid and has a spreadable texture.
Chantilly cream
- Beat together very cold heavy cream and cold mascarpone cheese until this is whipped. Keep gradually adding sugar.
Assemblage
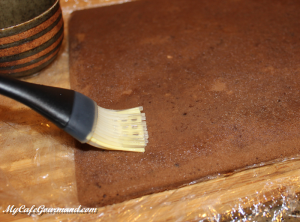
- Paint the biscuit with sugar syrup.
- Spread the chantilly cream evenly over the biscuit.
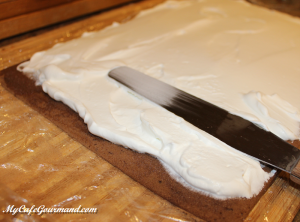
- Roll up firmly.
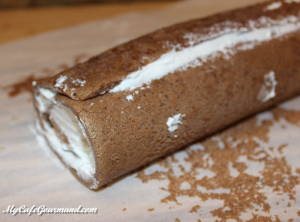
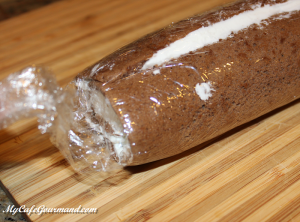
- Tightly cover with plastic wrap, and keep in the fridge until chocolate ganache is ready.
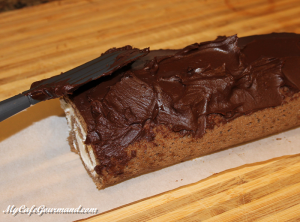
- Remove the plastic wrap. Spread the ganache over the cake. Using a fork make lines to look like a log. Transfer the cake to a serving platter and let stand in the fridge for a night or at least 3 hours.
- Before serving, dust with cacao cocoa powder and decorate with meringues or pieces of chocolate.
Notes
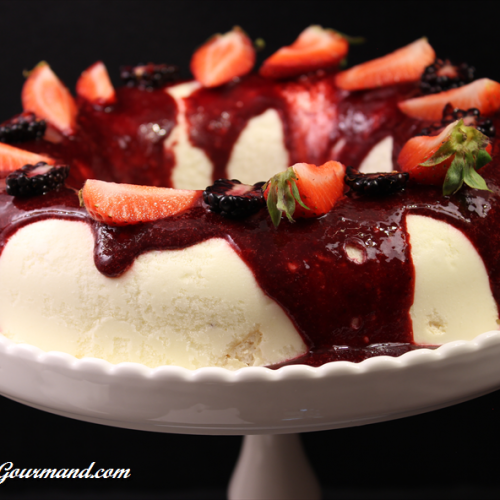
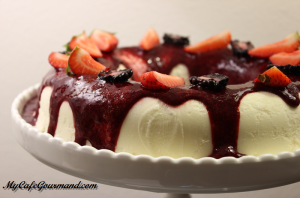
Ice Cream Cake Iceberg
I don’t mean to brag, but as far as homemade ice cream cake recipes go, this one is the winner. The red berry coulis topping is the perfect balance between sweet and sour. This No-Bake Ice Cream Cake Iceberg is the ideal dessert to serve at your next party on a hot summer day.
Ice Cream Cake Iceberg
Ingredients
- 4 eggs
- 100 g granulated sugar (50 + 50)
- 1-2 Tbsp vanilla extract
- 300 ml sour cream
- 100 ml heavy whipping cream ( 35%)
- 1 pinch salt
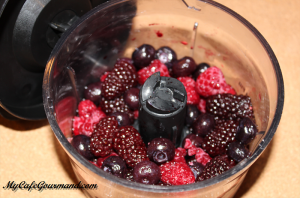
- 300 g red berries (blueberry, huckleberry, boysenberry, raspberry…) fresh or frozen
- Some Fresh berries for garnish
Instructions
- Separate egg yolks from egg whites. Whisk egg yolks with sugar (50 g).
- When the sugar is dissolved add vanilla extract and mix well.
- In a mixer bowl, whisk together very cold sour cream and heavy cream together until fluffy. Add sugar and continue whisking until firm (don’t over whip).
- Using a spatula, combine egg yolks with whipped cream together.

- In a separate bowl, beat the egg whites with a pinch of salt until stiff.
- With a spatula, carefully combine egg whites with whipped cream.
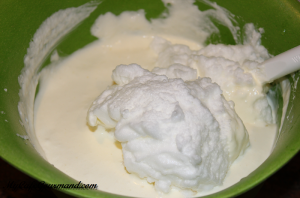
- You should get a nice fluffy cream.
- Spread the cream evenly into a silicone pan or salad bowl.
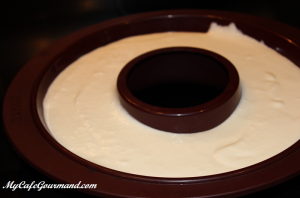
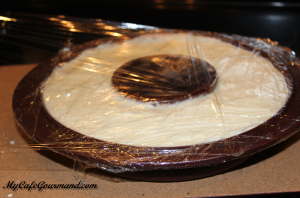
- Cover with plastic wrap and refrigerate for 6 hours or overnight.
- Rinse and drain fresh berries and puree until smooth. If you are using a frozen berries, place them in a leak-proof container and set the container in cold water for 10-15 minutes, then puree them.
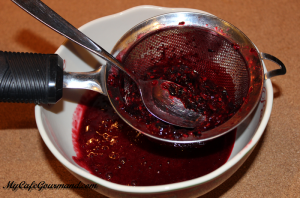
- Pass the puree through a fine sieve to remove all tiny seeds. Coulis is ready.
- Remove it from the silicone pan and return it back to freezer until serving. (If you used a salad bowl, place it into hot water for a couple seconds). Prepare fresh berries for garnish.
- Right before serving, pour the coulis over the ice cream cake and garnish with fresh berries.
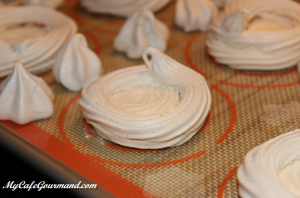
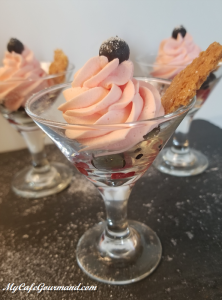
Mini Pavlova
Pavlova is a dessert, named after the Russian ballerina Anna Pavlova, who toured Australia and New Zealand in 1926. It is a meringue dessert with crisp crust and soft light inside, topped with cream and fresh berries.
You can make meringue shells ahead of time and freeze them. I usually make the cream the same day I want to serve my Mini Pavlova. And as always this dessert is a perfect mini dessert for my Cafe Gourmand.
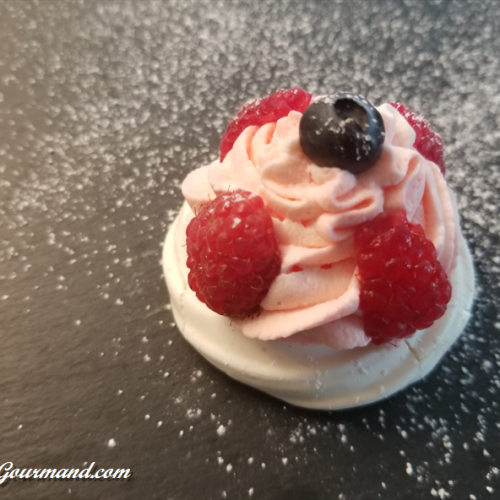
Mini Pavlova dessert
Ingredients
Meringue
- 4 egg whites (room temperature)
- 1 pinch of salt
- 220 g confectioner’s sugar
Cream
- 200 ml heavy whipping cream ( 35%) very cold
- 100 g mascarpone cheese
- 1,5 Tbsp sugar
- 1 drop red food coloring (optional)
- Fresh berries raspberries, strawberries, blackberries, blueberries…
Instructions
Meringue
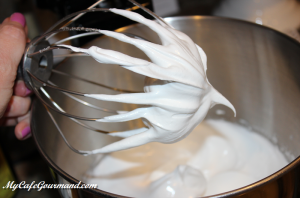
- Using mixer, begin beating your egg whites and salt on a low speed, steadily increasing up to medium high.
- While beating on a medium speed, slowly add the confectioner’s sugar, about 1-2 Tbsp at a time. Once all the sugar is added, keep beating until the egg whites hold stiff peaks.
- Preheat oven to 230 degrees F. Draw circles of approximately 4-8 cm diameter (you can use a pint glass as a guide) on each of the parchment lined sheets.
- Spoon meringue into piping bag, fitted with 3/4 inch tip. Pipe meringue to cover circles on prepared baking sheet. Pipe two more rings of meringues on top of outer edge to form walls of Pavlovas.
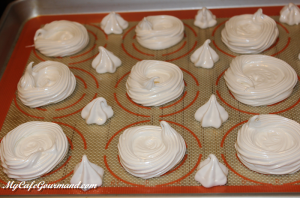
- Bake in center of oven until dry and crisp, about 1 1/2 hours.
- Turn off the oven and let the meringues completely cool in the oven. Once cooled, you can top them with whipped cream and berries.
Filling
- With mixer, beat together very cold heavy cream and mascarpone cheese, until whipped gradually adding sugar. Add food coloring. Don’t overbeat the cream, or you will end up with butter.
- Spoon cream into piping bag.
- Right before serving, pipe frosting on the pavlovas and top with fresh berries.
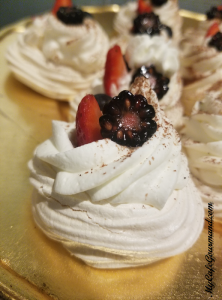
- If you have some leftovers cream, you can pipe it into a small glass and garnish with some fresh berries.
Notes
Walnut Pineapple Upside-Down Cake
Once baked, the walnuts get that gooey-caramel and crunchy coating. Your guests will love that Walnut Pineapple Upside-Down Cake.
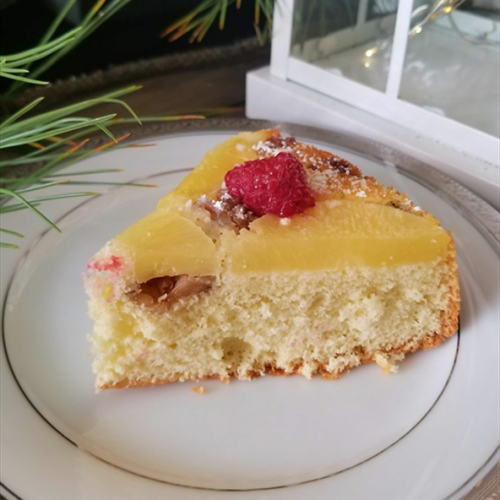
Walnut Pineapple Upside-Down Cake
Ingredients
- 7 rings pineapple slices drained
- 4 eggs
- 1/2 cup sugar
- 1 cup all purpose flour sifted
- 1/2 tsp vanilla extract
- 1/2 cup walnuts chopped
Instructions
- Preheat oven to 350 degrees F. Lightly grease a 9-10 inch round cake pan. Place pineapple slices on the bottom of the pan.
- In a large bowl, beat the eggs, sugar and vanilla on high speed for about 8 min. Slowly add flour. Using a spatula fold in gently. Continue until all of the flour mixture is incorporated.
- Add chopped walnuts.
- Carefully spoon mixture into a pan cake.
- Bake for 25-30 minutes or until toothpick inserted in center comes out clean.
- Cool for at list 10 minutes, then turn the pan over onto a serving plate. Wait 30 seconds then lift the pan off.